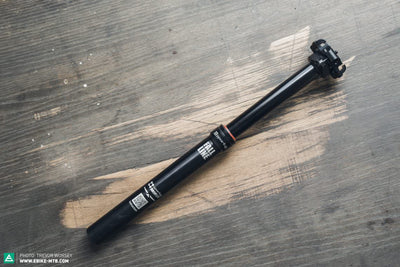

Fall Line Troubleshooting
If you believe that you may have an air leak, the first step is to locate the leak. Start by compressing the post down to roughly one inch and removing the post from your bike. Next pump your post up to approximately 100 psi and fully submerge it in a bucket of water. If there are any leaks they should present themselves now. Keep track of any bubbles you see and contact support@9point8.ca with your findings.
Note that when adding/removing air pressure from the Fall Line™ it takes approximately 5-10 seconds for the pressure to 'equalize' as air moves through our air cushion. This may look like it is leaking until the pressure has fully equalized. This also may mean that your gauge reads differently between checks.
Factory Service is available here.
If the post has been through a temperature swing (such as storing inside and then riding in very hot or cold weather OR travel on a plane as checked luggage) you may need to 'reset' the brake. In normal operation the brake automatically adjusts and resets itself overtime, but after large temperature changes it is faster to reset this manually. This is done by pulling the lever on the remote all the way and holding for about 5 seconds. You do not need to pull hard, once it reaches end of stroke that is all you need, don't try to overcome this. IF you pull too hard you may slip your cable or damage the post.
Additionally, check that there is a little free-play at the lever in all post positions (check at full up and full down). If not, turn-in the cable tension barrel adjuster. As the temperature changes the cable will grow/shrink and can move out of adjustment. Watch our troubleshooting tips video here.
We suggest setting the pressure as low as you can while still allowing the post to fully return. You may need to adjust this over time as the seals and wipers 'wear in' or get dirty. A good range is 20-30psi for most ride conditions. Note: Don't rely on the gauge on your air pump. We have found that MOST pumps (even those made by reputable companies) are VERY inaccurate at low pressures. If the post is returning violently reduce the pressure or it may damage the post.
Note that when adding/removing air pressure from the Fall Line™ it takes approximately 5-10 seconds for the pressure to 'equalize' as air moves through our air cushion. If you are too hasty with removing the pump you will have set it at the wrong pressure.
It should return fairly quickly and make a quiet top out noise to let you know it is up. It should not be violent. A good rule of thumb is that if you are afraid to get hit by it, it is too fast, please reduce the air pressure! Watch our return speed video here.
There are a couple of possible causes and solutions:
1. Check the air pressure and make sure your cable tension is set properly. If the brake is not being fully released it will 'drag' and slow down the return speed.
2. As the post 'wears' in and collects debris on the wipers it may need a slightly higher pressure to return at the same speed as when new. This effect will vary based on your riding climate. Fine dry dust tends to be the worst. Extreme cold temperatures will also tend to slow the post down as the grease thickens. The solution is typically to add a bit of extra pressure to get the return speed back to where you want it.
3. If you have a lot of miles on the post or ride a lot of hours in dry dusty area's (i.e. Arizona) or you are obsessive compulsive about cleaning the post thoroughly after every ride (and thus remove all of the grease from the stanchion) it is possible you need to re-lubricate the main nut. This is pretty easy, see 'how do I re-lubricate the main seal nut' below for details.
1. Check that the cable moves freely through the cable housing, and is not binding or snagging. Sometimes the cable can unravel internally, and become draggy. Sometimes the housing route may have a too-tight bend that causes the cable to drag internally. If the cable snags in the housing internally, then it will always pull on the seatpost and may release the brake.
2. Note that the cable can slightly tension and slacken itself with temperature change. Check the cable slack at the riding temperature. Watch our troubleshooting tips video here.
3. Too much air pressure will unlock the brake. If the cable is free and has slack, and if the post is still not locking, then lower the air pressure. Watch out freeplay adjustment video here. Don't necessarily rely on the gauge on your air pump. We have found that MOST pumps (even those made by reputable companies) are VERY inaccurate at low pressures. We suggest setting the pressure as low as you can while still allowing the post to fully return. Note that when adding/removing air pressure from the Fall Line™ it takes approximately 5-10 seconds for the pressure to 'equalize' as air moves through our air cushion. If you are too hasty with removing the pump you will have set it at the wrong pressure. Watch our air charge valve video here.
4. A contaminated shock pump can accidentally introduce shock oil or fork oil into the seatpost. Understand the problem by watching this video.
5. If the post has been through a temperature swing (such as storing inside and then riding in very hot, sitting in the hot sun, very cold weather OR travel on a plane as checked luggage) OR it has been sitting for a while OR if your cable tension is way too loose, you may need to 'reset' the brake. In normal operation the brake automatically adjusts and resets itself slowly over time, but in some instances it is useful to reset this manually. This is done by pulling the lever on the remote all the way and holding for about 5 seconds. You do not need to pull hard, once it reaches end of stroke that is all you need, don't try to overcome this. If you pull to hard you may slip your cable or damage the post. If you pull the lever all the way and you don't feel it 'bottom out' then try adjusting your cable adjuster all the way out to temporarily increase cable tension. You can also achieve the same effect by simply pulling on the cable housing on the back side of the remote until you feel it bottom out.
6. Also note that as you use the post it will wear in and the holding capacity actually goes up! If you don't feel like getting the set-up dialed, you can likely just wait it out and it will fix itself. Every time it slips it will hold a little higher next time. Gotta love a dropper that fixes itself!
7. If all else fails before e-mailing customer service it is helpful if you can determine if the problem is with the cable or the post. To do this, vent the air pressure down to 0 psi. Do a brake reset by pulling on the cable housing at the back of the remote lever until it bottoms out and hold for a couple of seconds. Disconnect the cable quick connector and then put the post back in your bike frame (with no cable attached). If the post still slips there is something wrong with the post. If it holds then the problem is in the set-up. 99% of our customer service calls are solved by focusing on cable tension and air pressure.
Before starting, watch our re-lube instructional video here.
1. Vent the pressure down to 0psi.
2. Unscrew the nut. If it is too tight to unscrew by hand try using an old piece of tire inner tube for more grip. If that fails, clamp the nut in a bike work clamp and unscrew by tuning the post. Once unscrewed, pull the nut up and out of the way.
3. Find the foam ring. This ring holds the lubrication. It could be stuck in the bottom of the nut or it could be in the top of the outer tube.
4. Lubricate in between the foam ring and the bottom of the main nut. It doesn't take much DO NOT OVER LUBRICATE. You want just enough to coat the top of the foam ring and to make a 1/8" - 1/4" fillet of grease between the foam ring and the tube.
5. Gently insert the foam ring back into the nut (don't squeeze all of the grease out!)
6. Wipe off any major excess and screw the nut back on.
We strongly suggest you only use P10L grease, available through 9point8's web store. It has been extensively tested in all temperature and weather conditions. In a pinch you can apply a wax based chain lubricant to the upper stanchion to add some temporary lubrication without disassembling the nut.
Brake Reset on the Trail Video
Brake Reset with Brake Release Tool Video
The Fall Line™ brake usually automatically adjusts itself over time to account for wear, temperature changes, etc. However, in some instances this adjustment may be slower than changing conditions such as:
1. If the post has gone through a significant temperature change (winter riding where the bike is stored outside, airline checked baggage or a really hot sunny day)
2. Sometimes if the post is sitting for a while (days or weeks) without riding it may loose it's adjustment position and need a quick reset.
3. If your cable tension is way too loose (i.e. poor setup or your cable slips) then the automatic adjustment function may be lost. Overtime it will get further out of adjustment and will need to be reset (and you should correct the cable setup too!).
So how do you do the reset? Easy! Simply pull the lever all the way until you feel it bottom out and hold it for a couple of seconds (10Mississippi's should be plenty). Make sure you feel the bottom. On some bikes your lever may contact something else before you reach the required stroke. In these cases you may need to adjust the cable tension adjuster all the way out until you can feel the remote bottom out when you press it. Alternately you can simply pull on the cable jacket at the back of the lever until you feel if bottom out.
NOTE: Only stroke the lever until you feel it bottom out, do not try to 'push past it'. If you push hard enough you can do damage to the post and likely you will also slip the cable.
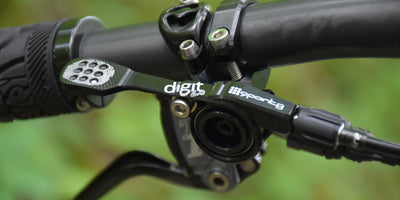
If you are having trouble installing your Fall Line™ quick connector follow these simple steps:
1. Slide the Cable Seal Nut down the cable.
2. Loosen the two set screws enough that they are no longer in contact with the cable.
3. Re-tighten the set screws making certain they are evenly tightened. Double check that set screws are not protruding past the diameter of the Cable Attachment Point.
4. Insert into the bottom of your seatpost. This may require a small amount of force. Do not try to force this connection as it may damage the mating threads.
Watch our cable clamp clip video here.
If you believe you have an air leak at the main nut seal, you may need to replace the main seal.
For post with the V2 nut, simply purchase a "Re-Use V2 Nut" rebuild kit here and follow the steps in this video.
For posts with the V1 nut, simply purchase a "Replace V1 Nut with V2 Nut" rebuild kit here and follow the steps in this video.
Factory Service options are available, shop here.
The spring-loaded keys are a little tricky to install. It is made much easier with our Fall Line Key Install tool.
Watch our install video here.